
Normally, I write about adventures in the outdoors. Today though, I’m going to write about something completely different – furniture restoration! Don’t worry if you only come here for stories about sea, adventure sports, gear and mountains – it’s not a permanent change. Normal service will resume shortly. Anywho enjoy reading about something different or just scroll down past it to read about some cool, snowy mountains:
For absolutely ages, I’ve always loved and pined for an old 50s or 60s kitchen larder unit. I think they’re so enigmatic and exciting. I loved their practical utilitarian design and use of colour. I’ve often thought that they would make a fantastic bureau style desk as most of them have a large door that would open down into a table, worktop or chopping board. I sometimes work from home although I do like to switch off and forget about work after ‘office hours’. I really like the idea of being able to keep all my work paraphernalia, laptop, stationary and general paperwork in one place. What’s even better is that I imagined with a larder you could then shut it all up, forget about all that stuff and get on with relaxation and have the evening to yourself. Even better still is that the whole thing would look fantastic and would be a striking piece of furniture to have in my house. It would also go very well with all the other vintage garb in my house. There was just one problem…
I’m not the first person to think that these old larders, which people used to throw away and burn 10 or 20 years ago, are now really cool. They’re super desirable. One that’s been done up to even a mediocre standard will easily set you back £300-£400 and even an old, decrepit larders fetch £100 on eBay. I searched for ages to find a good one locally, at a reasonable price and couldn’t find anything, no matter how bad the condition, for a decent price. Then one day…
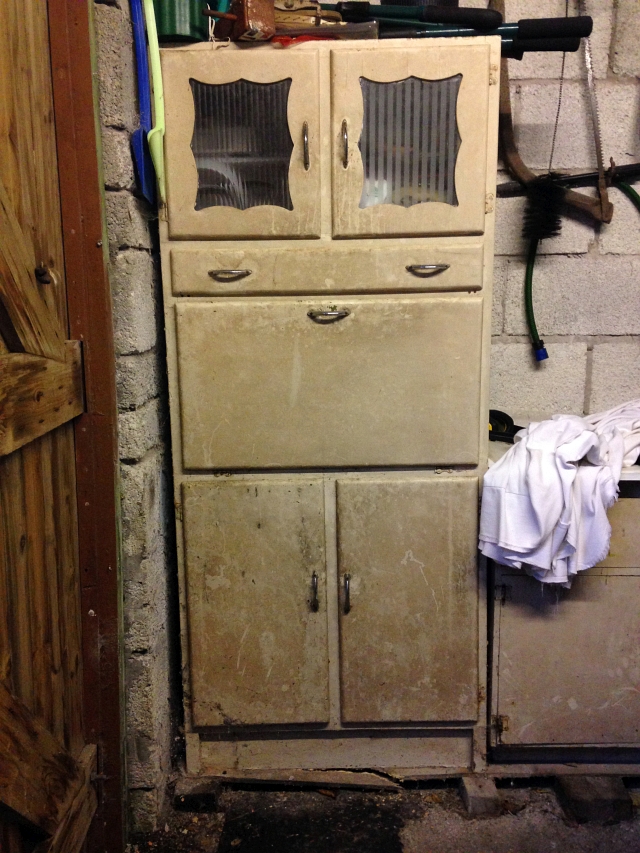
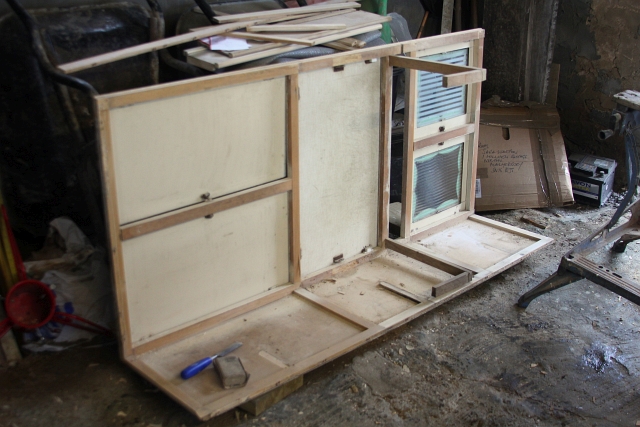
So early last summer (2016), I was talking to my grandparents and mentioned how I really liked these old larder units. To my surprise, they revealed that they had their old one, which they had bought brand new back in the day, sitting in their garage. We went out to see it and found the awesome (although pretty grotty) larder unit in the photograph above. They offered it to me and I was overjoyed to receive it! I finally had my larder and what was even better is that it had proper history and was a really good project for me to get my teeth into.
I came back a few days later when my granddad had emptied all of his half full tins of paint and boxes of rusty nails out of the larder (it had turned from a kitchen larder to garage junk storage unit!). We loaded the old, wobbly, wooden structure into my van and I drove away very happy. When I got it back, I gave the whole unit a really good once over and discovered a lot of de-laminating ply-board, a little woodworm city as well as a lot dirt, rust and old paint! Woodworm is something that can completely wreck furniture or even a house so the first port of call was to get a big ol’ 5L can of woodworm killer and pretty much bathe the whole larder in it from top to bottom.
As I liberally applied this solution, I further inspected the wood panelling and structure. I wanted the unit to last at least another 60 or so years and to be frank the wobbly, de-laminating side panels just weren’t going to last. I really wanted to keep as much of the larder original as possible and keep all that delightful vintage character but I also wanted to turn back the clock and get it looking almost as good as it was when it first came out of the workshop the first time. I made the tricky decision to replace the two sides and the back ply panels. It was going to be a fair bit of extra work, however, I was confident I could get it looking as good (possibly even better) than it did 60+ years ago.
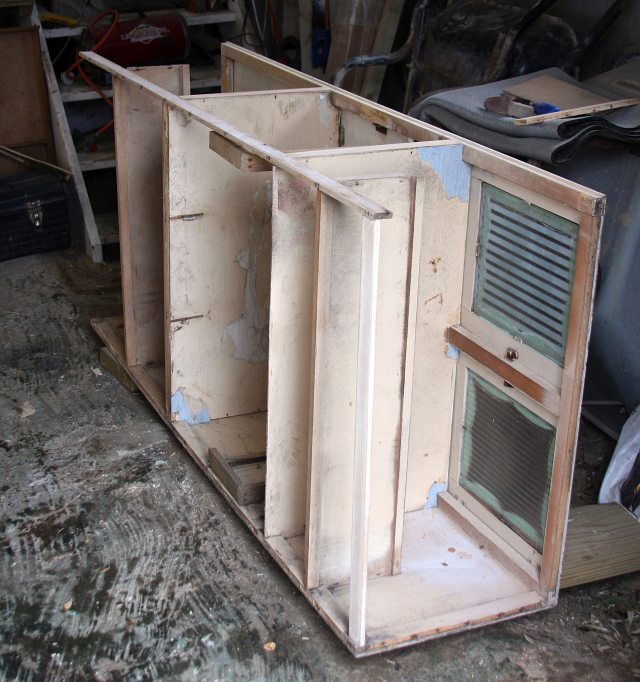
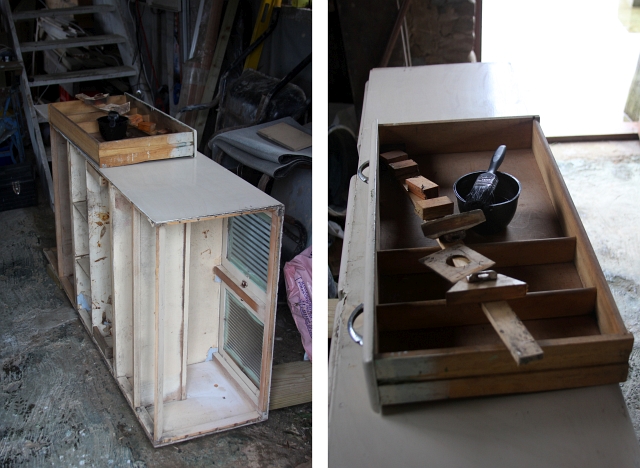
I peeled off the back and side panels to reveal the structural cross pieces and supports. These were all still in great condition and were straight and true. I gave them another lashing with woodworm treatment (better safe than sorry), numbered and labelled which panel they had come from and their position and placed them aside.
Dissembled, the larder unit was looking a bit sad, but things often have to get worse before they get better, it’s always darkest before the dawn and other cliches. I was careful to keep everything I could but all but the rotten, skewed ply was thrown away. I think when restoring old furniture, it’s important not to go overboard as your project can easily end up like Trigger’s Broom.
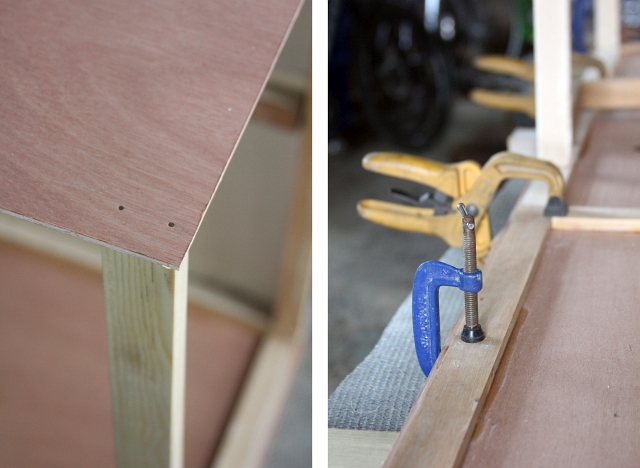
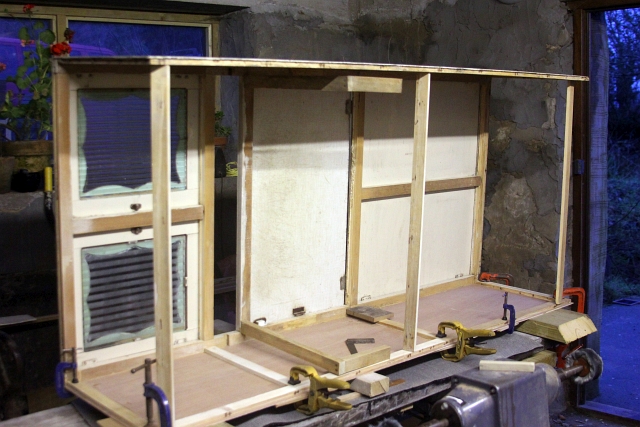
I left one side on the larder, to keep it stable and square, whilst I glued on my freshly cut piece of new ply. The old larder unit was beautifully and simply constructed and the front vertical frame had a recess so that the ply could simply slot up against it and sit flush. After this was thoroughly sanded and cleaned, a bead of wood glue was laid along the recess and the ply was butted up against it. Small pins then fixed it even more firmly in place and a selection of clamps held it in place overnight to cure.
The next morning, I was then able to replace all the side supports back into their original positions. I had carefully sanded and cleaned all of these too. With these glued and set, I took care to flip it over so that it was resting on the new ply side and then remove the final rotten piece of ply board.
From here, I could attach my second freshly made side panel and glue that in along with its internal supporting pieces. Many clamps, good quality wood glue and tiny specialist panel pins all added to the successful fixing of these panels.
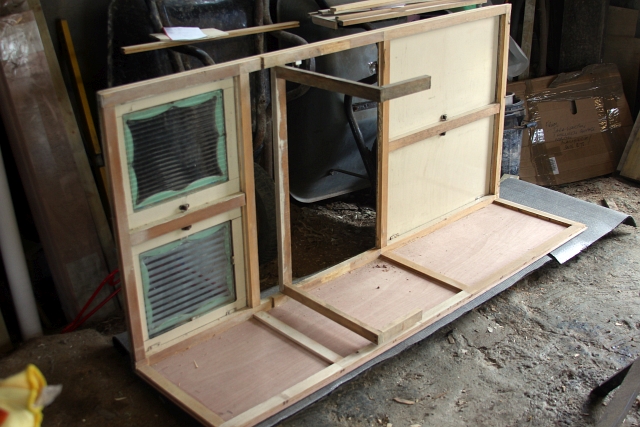
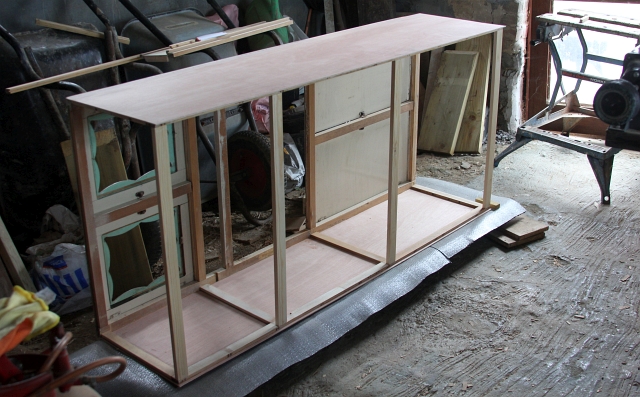
After even more waiting for glue to set, I was able to fix all of the cross braces back in place. With these now secured, the whole larder unit was starting to come together again and regain a little of its composure and integrity. It was certainly a lot less wobbly already than when I put it into the van the first time.
Obviously, as with all woodworking and furniture crafting, great care had been taken to ensure that everything was going in square and properly aligned. A few misplaced supports and the whole thing could have been twisted and stuck out of place.
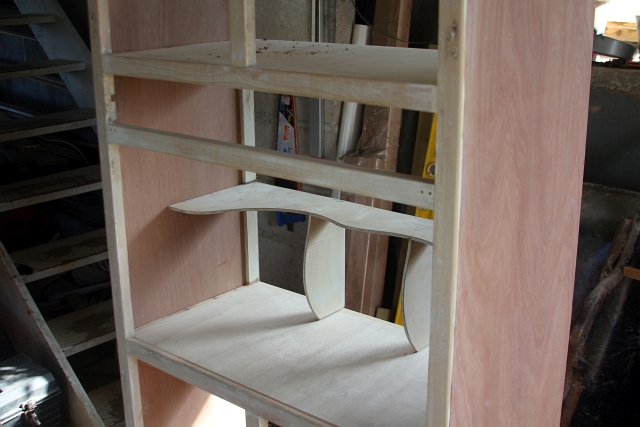
Although adding the back panel would firm up the whole larder enormously and give the unit its stability back, I didn’t add it back at this time as I still wanted to gain access to the interior sections so I could fix the shelving and sections.
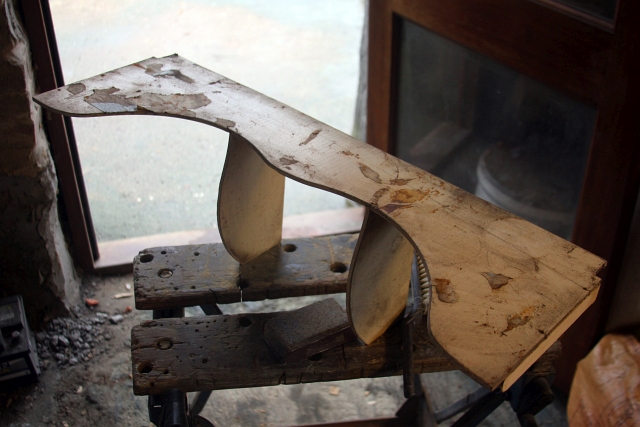
One of my favourite parts of the larder is this brilliantly curvy shelf that sat in the main compartment which is accessed from where the table top drops down. It was pretty grim but still structurally sound, I gave this a thorough clean and sand and prepared it for its refreshed home.
The cross panels and shelves were all still sound but were not really up to the jobs I intended them for so I braced them with thicker pieces of ply. I wanted to be able to work on these and place heavy folders on them without them bowing or creaking under the pressure. I made a few small additions and changes like this whilst putting the unit back together. I wanted it to be usable and functional as a ‘mini office’. I carefully ensured that any changes were not noticeable and didn’t detract or change the look of the larder.
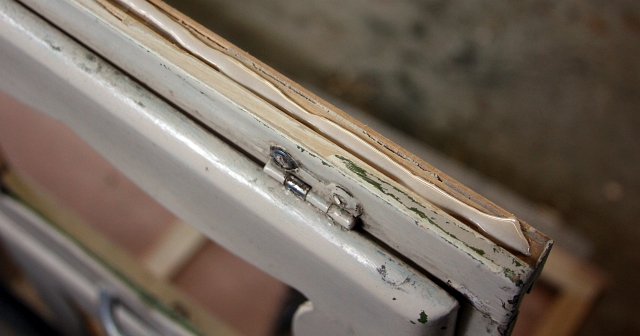
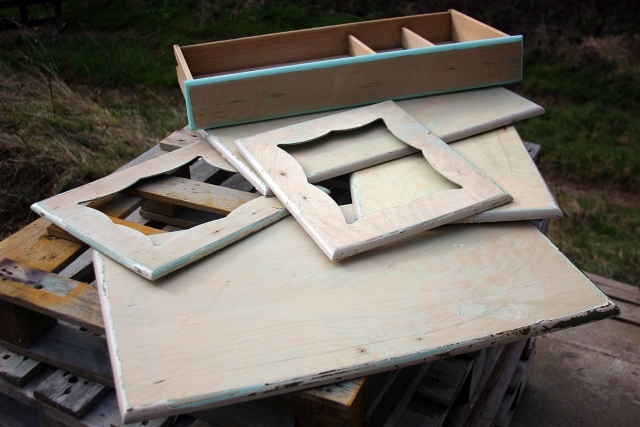
The doors on the larder did not want to come off. 60 year old flat head screws, that are as rusted as the titanic, do not remove nicely. I ended up not being able to salvage the hinges. It was a bit sad but to be honest I don’t think there would have been a way to ever get them moving properly again.
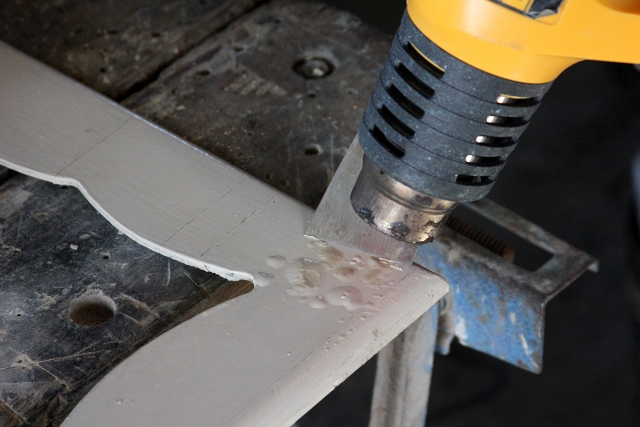
The next course of action was to start removing the paint from the doors. It was super thick in places. I started by using a heatgun to melt some of the paint and then scraping it off with a steel scraper. This worked well for a lot of the flat sides, it didn’t really work on the curved face though. Although it made good progress, there was a lot of paint and it took hours of scraping to remove the paint from these doors. Interestingly, there were four layers of paint on the larder. I felt like time team doing a dig, I would keep scraping, revealing extra unknown layers of different colours.

My grandparents had clearly kept the larder for so long that they had redecorated and repainted the larder 3 times. It had been two creamy colours, a brown and right underneath everything… it had started life as the most fantastic mint green colour. It was quite something to scrape away all the cream and brown to reveal an amazing bright, energetic mint green preserved for decades underneath coats of fresh paint. The mint green was just like that mosquito trapped in the fossilised tree sap in Jurassic Park. Well possibly not ‘just like’ but you get my metaphor.
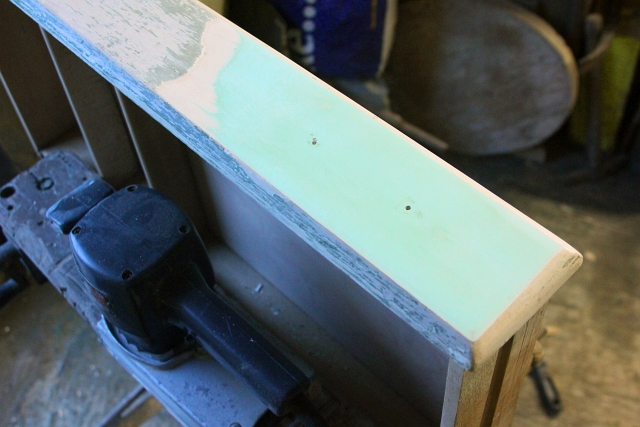
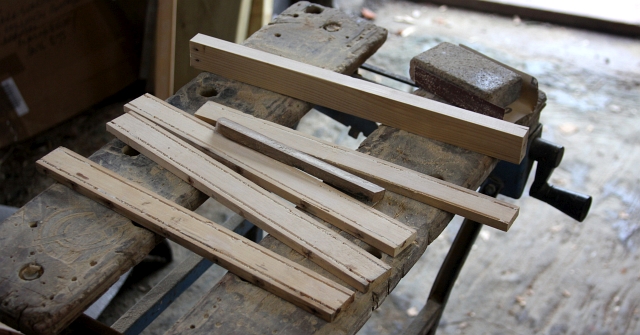
After hours of scraping and use of the power sander (above), they were pretty close to paint free. A great deal of sanding and tidying up was needed. The lengthy scraping had inadvertently taken its toll on the poor doors and there were several accidental scratched and deeper grooves that would need filling and fixing. Although hours of work had already gone into the project, I was still a long way from getting it finished.
To be continued…
I just acquired this exact same larder from my parents! I live in Texas. My parents bought this from an antique shop. Mine is an ugly brownish-cream color, but I’m hoping to change that. Thank you for the awesome post!
Author
No worries, I’m glad you enjoyed it. Have fun restyling your larder!