
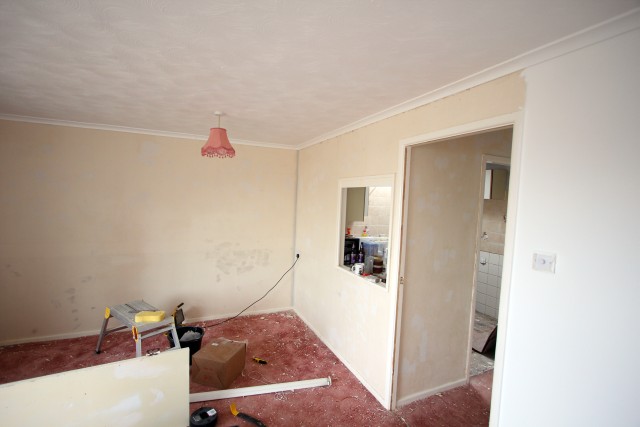
When over a month ago, I first got the keys and opened the door to my house, I was greeted by this view of a gorgeous 70s hatch, through from the lounge to the kitchen. I’m a big fan of vintage but this architectural retroness isn’t particularly to my taste. Here is what we did about it…

We started off by getting rid of that wallpaper, sorting out the walls (filling and re-plastering), renovating the coving and finally painting. You can see the varying degrees of decoration in the photo below; on the left we’ve revealed the original magnolia paint and started ‘making good’ and on the right we’re onto the painting. Beautiful, clean, airy, white!
Despite not liking the hatch, I quite fancied the idea of more open plan living. I decided that expanding the hatch would not only make the already large lounge even bigger, by drawing your eye right back to far side of the kitchen. I also thought that it would make all the rooms even brighter as they would share the sun from the windows and sky lights. Not only would it add to the aesthetics of the house but it would also improve socialising as I’d be able to talk to people relaxing in the lounge whilst I cooked and visa versa.
I thought about getting rid of the wall entirely but I like the idea of having a defined kitchen space and don’t much fancy having the entire kitchen (including all the washing up!) on display all the time. My plan was to expand the hatch and take out most of the wall above the worktop. This would create a sort of breakfast bar or MEGA HATCH!
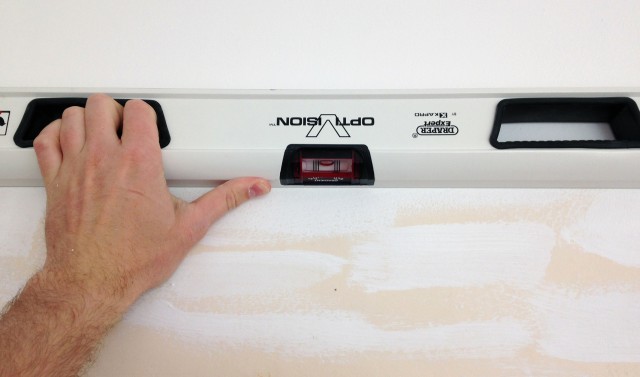
First thing I did was work out how big I wanted my hatch and where it was going to go. I used my new Draper Opti-Vision spirit level to draw my lines nice and straight and level. It was an easy job to do as the Opti-Vision has a high contract, red and white bubble that is very easy to see. It also has ergonomic grips that make it a pleasure to handle.
With the line all marked out and having checked the cavity wall for cables and other hazards, I started to remove (smash up) the original hatch. This claw hammer helped a lot with the ‘careful’ disassembly of the former frame. It’s carbon fibre shaft is covered with a comfortable rubber grip which does a great job of absorbing the shock from your walloping. With the frame history it was on to the best bit…
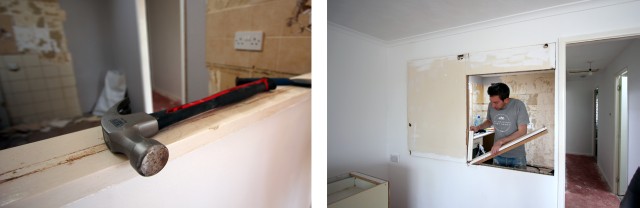
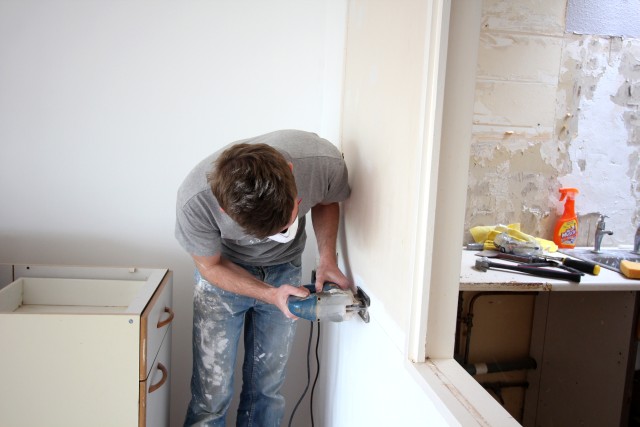
…getting the jigsaw out and cutting the wall away. Luckily, my previous checks were all correct and there was nothing hiding in the wall! I was worrying a tiny bit about bumping into some unknown cabling! I’m just going to point out that down below I have white paint in my hair and am not going prematurely grey.
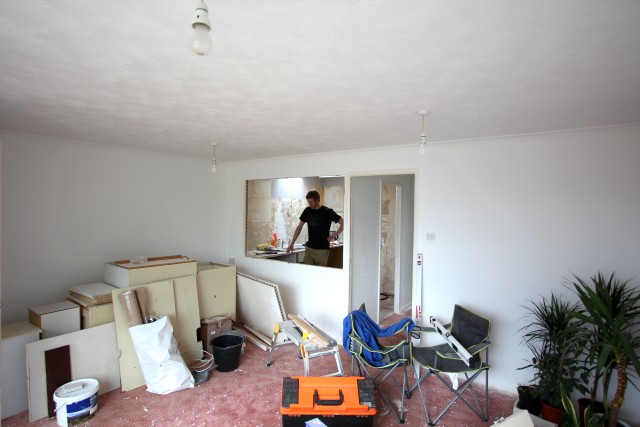
With a big ol’ rectangle cut out the wall, it just took one big shoulder barge for the whole thing to come crashing out and hey presto, one ancient serving hatch gone, a nice new modern, semi-open plan kitchen space created.
I’ve had friends and family around almost every day for the last six weeks or so, helping fix up the place. I’ve been struggling to show my appreciation for everyone’s hard work but one way I have been able to do it is with a good, steady supply of tea and biscuits. As you can see in the photo below a good drinks tray and a never-ending supply of chocolate hobnobs, jaffa cakes and digestives is definitely the way to keep a workforce happy.
